Introduction
When you work with CNC machines, it’s very important to install and align the chuck jaws correctly. The jaws hold your workpiece while the machine cuts or shapes it. If the jaws are not set up properly, it can cause many problems.
Quick fact: An improper setup can damage your cutting tools, make you lose parts, or leave a poor surface finish on your product.
On the other hand, doing it the right way brings big benefits. Your machine will be more accurate, your tools will last longer, and you will have fewer mistakes in production.
In this guide, you’ll learn clear, simple steps on how to install and align jaws on a CNC power chuck. This will help you do the job safely and efficiently.
Understanding the Types of Jaws and Chucks
Types of CNC Power Chucks
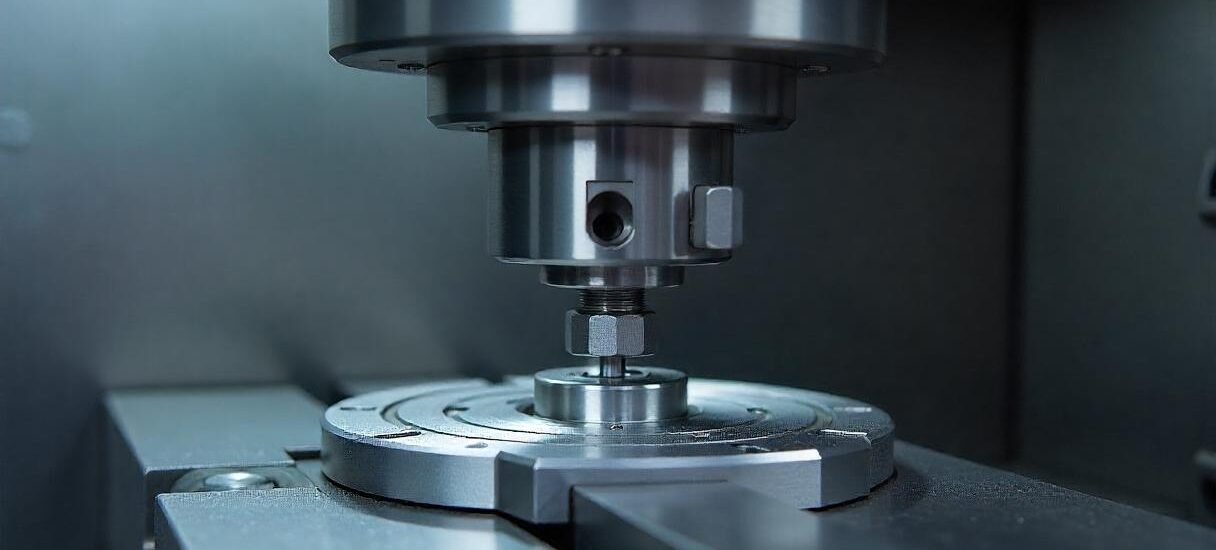
A CNC power chuck is a device that holds and rotates your workpiece. It uses hydraulic or pneumatic power to clamp the part tightly. There are many types, but most shops use three-jaw or four-jaw power chucks.
-
Three-jaw chucks automatically center the part.
-
Four-jaw chucks allow you to adjust each jaw independently for odd shapes.
Hard Jaws vs. Soft Jaws
-
Hard jaws are made of hardened steel. They last a long time but have limited grip shapes.
-
Soft jaws are usually made of mild steel or aluminum. You can machine them to fit special shapes, which gives better holding for tricky parts.
Common Materials and Sizes
Jaws come in many sizes to fit different chucks. They are usually made from steel, aluminum, or special alloys. The choice depends on your job’s needs.
How Jaws Attach to the Chuck
Fixed vs. Independent Jaws
-
Fixed jaws move together. They are fast and easy for round parts.
-
Independent jaws move separately. They are useful for square or odd shapes.
Jaw Mounting Systems
Most jaws slide into a dovetail or bolt into a groove on the chuck. Always check your machine manual for the right method.
Importance of Correct Jaw Selection
Picking the right jaws is key. They must match your chuck model and also fit your workpiece properly. If not, it could reduce clamping force or hurt your part’s accuracy.
Preparing for Installation
Tools and Equipment Needed
Here’s what you’ll need before starting:
-
Wrench (torque wrench is best)
-
Dial indicator
-
Soft mallet
-
New or cleaned jaws
-
Cleaning cloths and solvent
Safety Precautions
-
Always turn off and unplug the CNC machine.
-
Wear safety glasses and gloves.
-
Keep your work area clean and organized to avoid accidents.
Cleaning and Inspecting the Chuck
-
Remove the old jaws carefully.
-
Inspect the chuck and old jaws for cracks or heavy wear.
-
Clean all surfaces with solvent so no chips or dirt stay.
Installing Jaws on the Power Chuck
Mounting the Jaws Correctly
-
Slide the jaws into the dovetail or bolt them into place.
-
Make sure each jaw is aligned straight.
-
Push them in so they sit snugly without gaps.
Tightening Jaws Properly
-
Use a calibrated wrench to tighten bolts.
-
Follow the manufacturer’s torque specs so you don’t over-tighten or under-tighten.
-
Check each bolt’s tightness evenly.
Checking for Proper Seating
-
Move the jaws in and out to be sure they slide smoothly.
-
Look closely — there should be no gaps or rocking.
-
Use a dial indicator to measure runout (side-to-side or up-down movement).
Properly Aligning the Jaws for Precision
Setting the Initial Position
-
Place a dial indicator on the chuck face or on a test piece clamped by the jaws.
-
Slowly rotate the chuck by hand.
Verifying and Adjusting Alignment
-
Watch the dial indicator needle. If it moves a lot, the jaws aren’t aligned.
-
Adjust small jaw screws (if your chuck has them) until the runout is very low.
Fine-Tuning and Locking the Jaws
-
Make tiny adjustments to get perfect centering.
-
Once aligned, lock down all adjustment screws tightly.
-
Write down your settings for this job so next time it’s faster.
Final Checks and Confirmations
-
After running the machine for a few minutes, stop and check the jaws again.
-
Tighten bolts if needed.
-
Test by machining a sample part. Measure it to see if dimensions are correct.
-
Record your jaw positions and indicator readings. This helps repeat setups later.
Expert Tips & Common Pitfalls
Tip from an experienced machinist:
“Always clean the chuck and jaws completely before installing. Even small chips can throw off your alignment.”
Common mistakes to avoid:
-
Not cleaning the jaws and chuck — dirt causes misalignment.
-
Uneven tightening of bolts — this can twist the jaws.
-
Forgetting to check runout with a dial indicator.
Regular inspection helps a lot. Check your jaws and chuck surfaces every few days if you run production work.
Conclusion
Properly installing and aligning jaws on a CNC power chuck is very important for your shop’s success. It improves accuracy, extends tool life, and reduces costly mistakes.
Remember these key steps:
-
Prepare well — clean and inspect everything.
-
Mount the jaws carefully and tighten them to the right torque.
-
Align with a dial indicator until your part runs true.
-
Test, record, and recheck after initial runs.
With good setup practices, you’ll save time, cut down errors, and keep your machine running at its best.
✅ Final tip:
Taking a little extra time to set up your chuck jaws correctly pays off. It