Digitization for embroidery is the process of converting artwork, logos, or designs into digital stitch files (e.g., DST, PES) that embroidery machines use to create high-quality designs on fabrics. For beginners, this can seem daunting, but professional services like ZDigitizing make it accessible by delivering optimized files in 2-12 hours for $10-$20 per design, no expertise required. This beginner-friendly guide explains what digitization is, how it works, and how to get started, offering practical tips and insights for flawless embroidery. A concise FAQ section at the end addresses common questions to help newcomers navigate the process with confidence.
What is Embroidery Digitization?
Embroidery digitization transforms a design—such as a logo, monogram, or pattern—into a digital file that tells an embroidery machine where and how to stitch. The file specifies stitch types (e.g., satin for outlines, fill for large areas), density, and color changes, tailored to specific fabrics (e.g., cotton, denim) and machines (e.g., Brother, Tajima). Beginners can outsource this to professionals or use software like Hatch ($1,099-$1,499), but outsourcing is often easier and more affordable for those starting out. Digitization ensures precise, durable embroidery for projects like T-shirts, caps, or personalized gifts.
Why Digitization Matters for Beginners
For beginners, digitization is key to achieving professional results without technical skills. It allows you to:
-
Create Professional Designs: Turn simple artwork into polished embroidery for branding or crafts.
-
Save Time and Money: Avoid costly software and lengthy training by outsourcing.
-
Experiment with Creativity: Add logos, monograms, or patterns to apparel or gifts.
-
Ensure Quality: Optimized files prevent issues like puckering or thread breaks.
Professional services make this process approachable, requiring only basic input from users.
How Digitization Works: A Beginner’s Overview
The digitization for embroidery process involves several steps, most of which are handled by professionals when outsourcing:
-
Artwork Preparation: Create or select a design (e.g., JPG, PNG, AI) with bold, simple elements.
-
File Conversion: Experts use software to map stitches, adjust density, and assign thread colors.
-
Optimization: The file is tailored for your fabric, machine, and design requirements.
-
Preview and Revision: A digital preview shows how the design will stitch, allowing adjustments.
-
Delivery and Stitching: The finalized file is sent for use on your embroidery machine.
Beginners only need to provide artwork and specifications, with services like ZDigitizing handling the rest.
Step-by-Step Guide to Getting Started
Follow these simple steps to digitize your first embroidery project using a professional service:
Step 1: Choose Your Design
Select a beginner-friendly design for embroidery.
-
Keep It Simple: Use bold logos, text, or patterns with 3-5 colors and no fine details (elements at least 0.1 inches wide).
-
High Resolution: Ensure artwork is 300 DPI or higher in JPG, PNG, or AI format for clarity.
-
Tools for Creation: Use free platforms like Canva to create or simplify designs, removing gradients or intricate lines.
Tip: If unsure, ask your digitizing service for advice on embroidery-friendly designs.
Step 2: Select a Professional Digitizing Service
Choose a reliable provider to avoid technical hurdles.
-
Research Options: Look for services like ZDigitizing with strong reviews on Trustpilot or Google, offering fast delivery and support.
-
Check Features: Ensure they provide digital previews, unlimited revisions, 24/7 support, and compatibility with your machine.
-
Verify Pricing: Expect $10-$20 per design, with bulk discounts for multiple designs.
Tip: Start with a service offering rush delivery (under 2 hours) for urgent projects.
Step 3: Upload Your Artwork
Submit your design through a secure platform.
-
Use the Portal: Most services offer drag-and-drop uploads for ease.
-
Ensure Quality: Double-check resolution to avoid delays from cleanup.
-
Add Notes: Specify the design’s purpose (e.g., T-shirt logo, cap monogram) for tailored results.
Tip: Save a backup of your artwork for future reference or reorders.
Step 4: Specify Your Requirements
Provide details to ensure the file meets your needs.
-
Design Size: Note dimensions (e.g., 2-3 inches for T-shirts, 4 inches for caps) to fit your machine’s hoop.
-
Placement: Indicate where the design will go (e.g., left chest, hat front).
-
Fabric Type: Specify materials (e.g., cotton T-shirt, twill cap) for optimized stitches.
-
File Format: Check your machine’s manual for formats (e.g., PES for Brother, DST for Tajima).
-
Special Requests: Mention techniques like 3D puff or appliqué, if desired.
Tip: Create a checklist (size, placement, fabric, format) to streamline submissions.
Step 5: Review the Digital Preview
Check the virtual simulation to confirm quality.
-
Verify Stitches: Ensure stitch types (e.g., satin, fill) and density look clean and balanced.
-
Check Colors: Confirm thread colors match your artwork or brand palette.
-
Request Revisions: Use unlimited revisions to fix issues like gaps or misalignment, processed within hours.
Tip: Zoom into the preview to spot errors before stitching.
Step 6: Download and Test the File
Receive and test the file to ensure it works.
-
Download: Get the file within 2-12 hours via a secure link.
-
Test on Scrap Fabric: Stitch on a material matching your project (e.g., cotton for T-shirts) with appropriate stabilizers (tear-away for lightweight fabrics, cut-away for stretchy ones).
-
Check for Issues: Look for puckering, thread breaks, or misalignment, contacting support if needed.
Tip: Use the same threads and settings as your final project during testing.
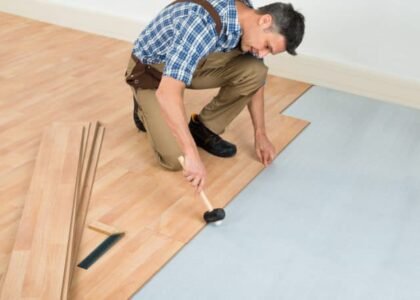
Step 7: Embroider Your Project
Create your final design with confidence.
-
Set Up Your Machine: Use the correct hoop size and stabilizer for your fabric.
-
Choose Quality Threads: Select durable polyester threads in colors matching your design.
-
Monitor Stitching: Watch for issues like shifting, pausing to adjust tension or speed if necessary.
-
Start Small: Begin with one or two items to perfect the process before scaling up.
Tip: Keep notes on settings (e.g., tension, speed) for consistent results in future projects.
Benefits of Professional Digitization for Beginners
Outsourcing to services like ZDigitizing offers beginners significant advantages:
-
Ease of Use: No need to learn complex software or invest in tools ($1,000-$5,000).
-
Affordable Pricing: Rates of $10-$20 per design, with bulk discounts for multiple projects.
-
Fast Delivery: Files delivered in 2-12 hours, ideal for quick crafts or events.
-
High Quality: AI-optimized files ensure clean, durable embroidery without puckering or gaps.
-
Support for All Projects: From logos to monograms, tailored for any fabric or machine.
-
Eco-Friendly: Optimized files and digital workflows minimize thread and fabric waste.
Common Beginner Projects
Digitization supports a variety of beginner-friendly projects:
-
Personalized Gifts: Monogrammed towels, bags, or blankets for birthdays or weddings.
-
Small Business Branding: Logos on T-shirts, caps, or aprons for startups or Etsy shops.
-
Team Merchandise: Embroidered names or logos on jerseys for local sports teams.
-
Promotional Items: Simple designs on tote bags or hats for events or giveaways.
-
Hobbyist Crafts: Custom patterns on pillows or jackets for personal use.
ZDigitizing’s user-friendly services make these projects achievable for beginners.
Common Mistakes and How to Avoid Them
Beginners often encounter these pitfalls, but they’re easy to avoid:
-
Low-Quality Artwork: Blurry images lead to poor stitching.
-
Solution: Use 300 DPI files with bold, simple designs (3-5 colors).
-
-
Incorrect File Format: Using a format incompatible with your machine (e.g., DST instead of PES).
-
Solution: Check your machine’s manual and specify the format to your provider.
-
-
Skipping Previews: Not reviewing digital simulations.
-
Solution: Always check previews and request revisions for accuracy.
-
-
Ignoring Fabric Type: Not specifying fabric leads to puckering.
-
Solution: Note fabric (e.g., cotton, knit) for optimized files.
-
Professional services help beginners avoid these issues with guidance and expertise.
Technologies Supporting Beginner Digitization
Modern tools make digitization beginner-friendly:
-
AI Optimization: Automates stitch mapping and error detection for flawless results.
-
Cloud Platforms: Enable easy uploads, previews, and delivery, accessible on mobile or desktop.
-
Encryption: SSL/TLS protocols protect your designs during transmission.
These technologies ensure a smooth, secure process for newcomers.
Future Trends for Beginners in 2025
In 2025, digitization will become even more accessible:
-
Augmented Reality (AR): Preview designs on virtual fabrics for easy planning.
-
AI Guidance: Suggest stitch settings or design tweaks for beginners.
-
IoT Integration: Sync with smart machines for automatic adjustments, reducing errors.
These trends will simplify the process further, empowering beginners to create professional embroidery.
Conclusion
Digitization for embroidery is an accessible, beginner-friendly way to create stunning designs on fabrics, from personalized gifts to branded apparel. Professional services like ZDigitizing make it easy by delivering optimized stitch files in 2-12 hours for $10-$20 per design, requiring no software or expertise. By following simple steps—choosing bold artwork, specifying requirements, reviewing previews, and testing files—beginners can achieve professional results. With AI, cloud platforms, and eco-friendly practices, digitization is both efficient and sustainable. As AR, AI, and IoT technologies evolve, beginners will find embroidery digitization even easier, opening endless creative possibilities.
FAQs About Digitization for Embroidery for Beginners
What is embroidery digitization?
It converts artwork into digital stitch files for embroidery machines to create designs on fabrics.
Do beginners need digitizing skills?
No, professional services like ZDigitizing handle all technical tasks, requiring only artwork and specifications.
How much does digitization cost?
Rates start at $10-$20 per design, with bulk discounts for multiple designs.
How fast is professional digitization?
Files are delivered in 2-12 hours, with rush options under 2 hours.
What artwork works best for beginners?
High-resolution (300 DPI) JPG, PNG, or AI files with bold, simple designs and 3-5 colors.
What projects are good for beginners?
Monogrammed gifts, small business logos, team merchandise, promotional items, or hobbyist crafts.
How do I avoid digitizing mistakes?
Use high-quality artwork, specify fabric and format, review previews, and test on scrap fabric.
What technologies support beginners?
AI optimization, cloud platforms, and encryption ensure ease, accuracy, and security.
Is digitization eco-friendly?
Yes, optimized files and digital workflows minimize thread, fabric, and paper waste.
What’s the future for beginners in digitizing?
AR previews, AI guidance, and IoT integration will make digitization even simpler and more accessible.