Before installing any new flooring, the condition of the surface underneath matters more than most people realize. A clean, level, and dry base ensures the new floor looks good and lasts longer. Skipping or rushing this part can lead to costly problems later. In this guide, we’ll go over the essential steps to create a solid foundation for any flooring type.
Start with a Complete Room Clear-Out
The first step in preparing your floor is removing everything from the room. Take out all furniture, rugs, and even baseboards if necessary. This gives you full access to the surface and prevents dust or debris from hiding under items. It also helps you spot any damage or irregularities early on. A completely clear space is easier to clean and work in.
Remove Old Flooring Material
If you’re replacing old flooring, it needs to be taken out completely. Peel back carpets, remove vinyl, or pry up laminate. Take your time and wear protective gear if needed. Watch out for leftover nails, glue, or staples. These will interfere with the new floor and must be removed carefully.
Clean Off Dust, Dirt, and Debris
Once the old floor is out, sweep the area thoroughly. A broom works, but a shop vacuum is even better. It removes fine dust from corners and seams. Go over the floor more than once if needed. Even a small amount of debris can cause imperfections in the finished floor.
Scrape and Smooth the Surface
After the loose debris is gone, scrape off any stuck-on material. This might include dried glue, paint, or small bits of flooring. Use a floor scraper or putty knife. Be sure to move slowly and check your progress often. You don’t want to gouge or damage the subfloor during this step.
Deep Clean for Best Results
A final cleaning is needed before you begin any installation. Use a damp mop or cloth with a neutral cleaner. Avoid harsh chemicals that could react with flooring adhesives. Allow the area to dry fully before continuing. Moisture can cause warping, mold, or bonding issues.
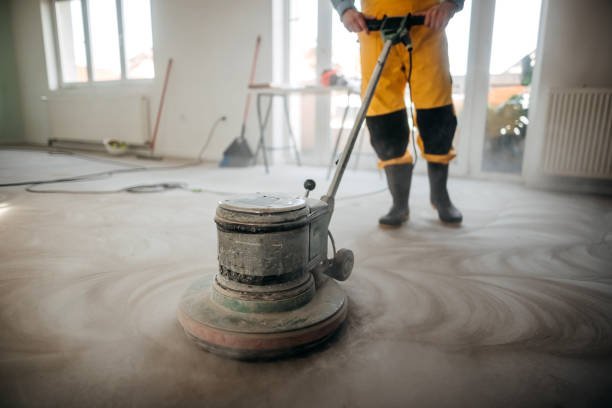
Surface-Specific Cleaning Methods
Different subfloors need different cleaning methods. Wood, concrete, and tile each require a unique approach. Make sure you know what surface you’re working with. For cement subfloor cleaning, it’s important to scrub thoroughly and remove all fine dust. Any leftover grit can weaken adhesive and create uneven spots.
Inspect for Cracks or Uneven Areas
Before moving forward, check the entire surface. Look for cracks, low spots, or damage. These problems will affect how the new flooring sits and performs. Use a level to find high or low points. Mark them and plan for repair. For minor dips, a floor patch or leveling compound can help.
Deal with Moisture Issues
Moisture is one of the biggest threats to new flooring. Check for signs of dampness or water damage. Basements and concrete floors are especially vulnerable. Use a moisture meter if you’re unsure. If moisture is present, fix the issue before proceeding. Skipping this step could ruin your new floor.
Final Vacuum and Dust Removal
Just before installation, go over the space one more time. Use a clean, dry microfiber cloth or vacuum to remove any remaining dust. This final pass makes sure nothing interferes with bonding or alignment. It also protects your new materials from early damage.
Prep Surrounding Areas
Clean and inspect more than just the floor. Check the baseboards, vents, and lower walls. Dust or debris from these areas can fall and settle on your clean surface. This part is key in household sub cleaning before new floor installion. A clean environment ensures better results and reduces extra work during the project.
Conclusion
Creating the perfect foundation for your flooring takes time, but it pays off. A clean, level, and dry base gives your floor the best chance to look great and last long. Skipping any part of this prep process could lead to issues down the road. Follow these steps to get it right from the start.